

Click 'read more' to read the tutorial!
Step 1: We cook the rice.
Bear in mind that sushi rice is different. It's shorter and fatter and much tastier too in my opinion =D I bought this brand since Giant only has this at the moment. You can buy from any brand as long as it is the same type of grain.
 |
| This is a seriously big packet only suitable for people who makes a lot, like me :) |
Step 2: We season the cooked-rice.
This step needs to be done once the rice is just cooked! Well, because the rice is still hot and soft. Seriously, if you ask me how much of vinegar or sugar or salt I put in... well, the answer is I don't know. I cook like a boss most of the time anyway hahahaha! Okay just kidding. But then, I really agak-agak in everything only.
First, please prepare a separate bowl for mixing.
Below is the approximation for 3 cups of COOKED rice:
i) 5 tablespoons of vinegar
ii) 3 tablespoons of fine sugar
iii) 1 1/2 teaspoons of fine salt
Mix the ingredients until the sugar is at least 90% dissolved to get the taste. For me, I don't have that much patience to stir it 1000 times before the sugar is properly dissolved, hence I chose to microwave the mixture before stirring to minimize the time :)
 |
| See that bottle? It's the special sushi vinegar that I use. Don't use normal vinegar please! |
 |
| Now, you pour in little by little and hope that your hands won't be thoroughly cooked by the hot vapour by the time you're done! |
Step 3: Leave the rice to cool.
While waiting, go cut up all the ingredients you wish to wrap into your roll. For me, I chose to add in some zucchini, carrots and fried egg for the roll. I also sliced up some salmon for another type of sushi.
 |
| See see see! It's all sliced up into long strips. Even the eggs, yes. |
For me, I start with the salmon first, because I don't want it to be left out in the hot weather for too long.
 |
| First, you just grab some rice and squeeze it into an oblong shape like this. |
 |
| Then, you just press on a slice of salmon that you cut up before this. If your hands are too sticky with rice, you can dip it in some water to kill the over-stickiness but make sure your hands are not too wet either. Just slightly! |
 |
| Since I'm lazy to take so many photo's, here comes the end product when all the salmon sushi are done! |
 |
| Please cover it will a plastic wrap or something before refrigerating it to prevent the germs in the fridge. |
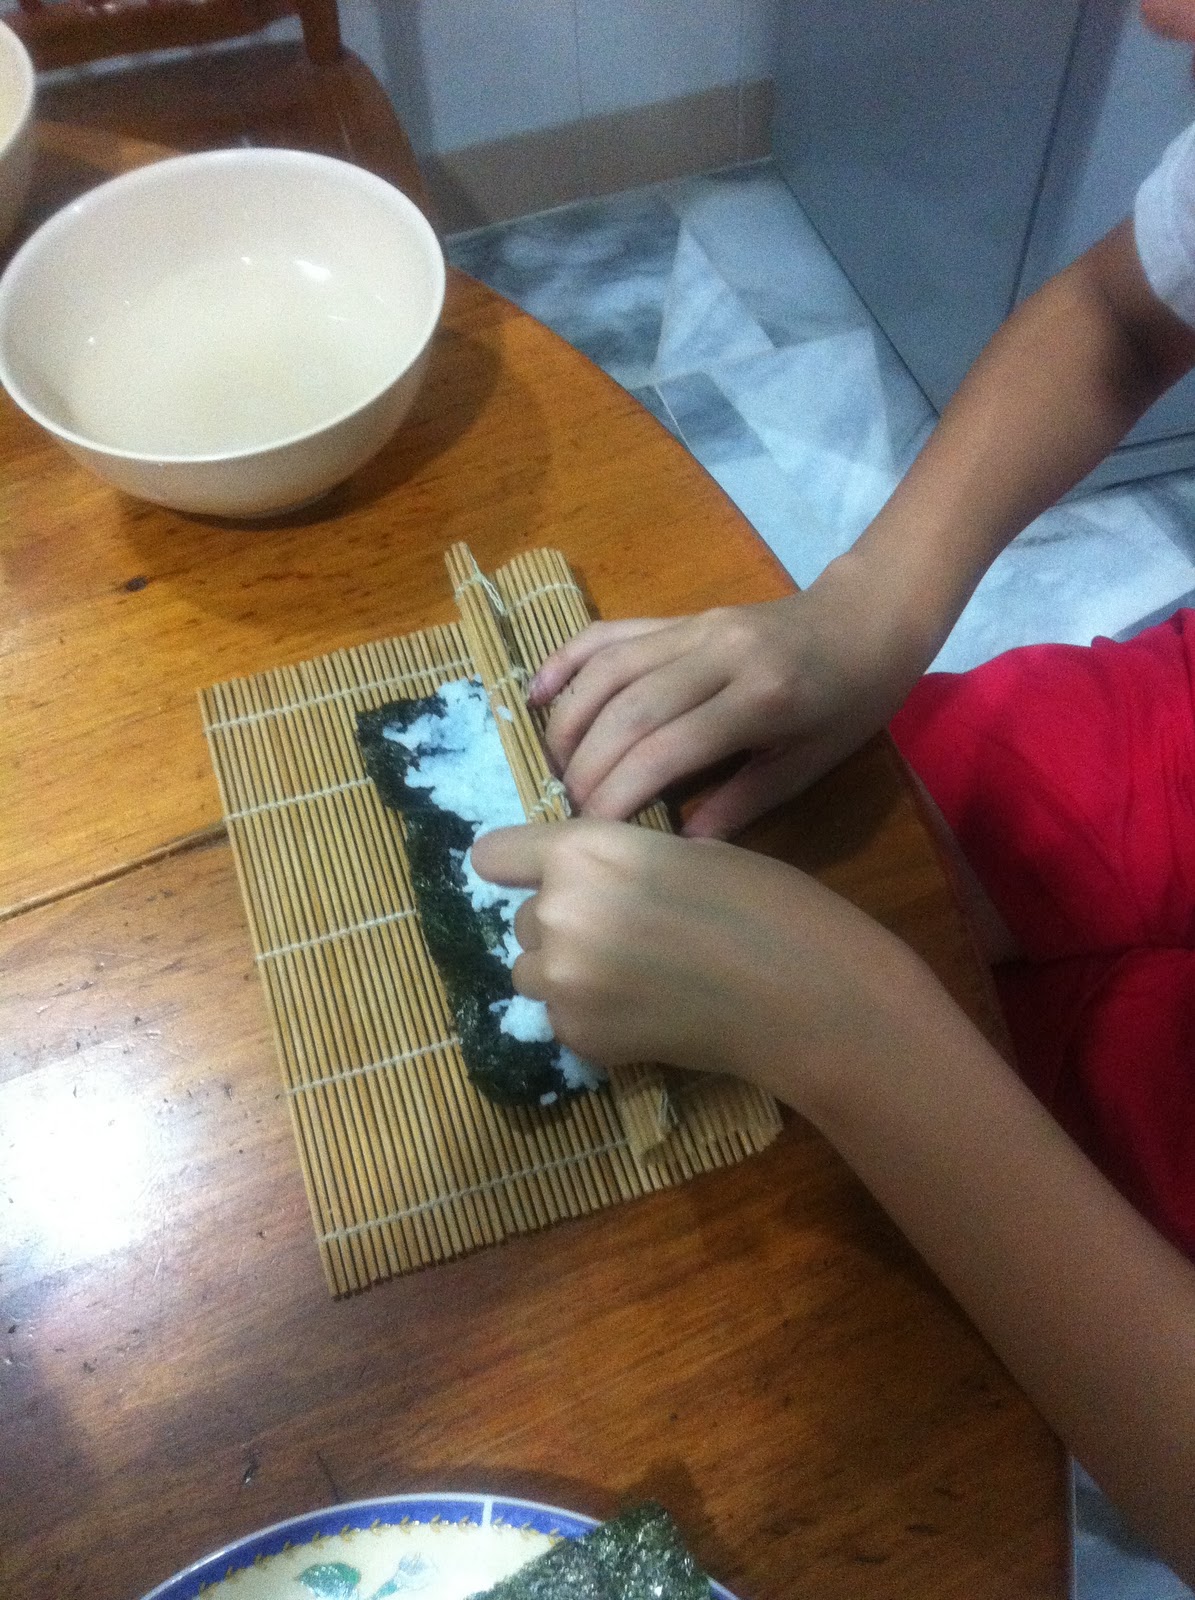
Step 5: Now, we proceed to the roll!
 |
| First, we put a new nori sheet on to the bamboo stick mat. The rough side facing-up. Yes, you can feel that one side will be smoother than the other. |
 |
| Then, you add a dollop of rice on to the sheet and spread it out evenly. Notice that the top left corner, that end does not have much rice on it. This is to prevent the rice from flowing out after being squeezed into a roll. |
 |
| So, then you can add your ingredients that you just sliced up just now. Bear in mind, the more ingredients you put, the fatter the roll. Put the ingredients on the end with rice underneath! |
 |
| We wrap up all the ingredients under the seaweed first, so that nothing is left out. Then, we roll a little more. |
 |
| About halfway through rolling, use the bamboo mat to roll it, like how I do it in the picture. You kinda roll the thing by pushing the rolled-up section with mat. You will get the feel when you do it. HAHA! |
 |
| Tighten the roll with the bamboo mat too while rolling otherwise your sushi roll will be too loose for a nice cut. |
 |
| There! One done! |
 |
| and suddenly... ALL DONE! |
Rule for slicing sushi. Please make it even slices. To make the job quicker, take 2 rolls at once. Put them side by side, adjacent to each other, so that we can slice two rolls at once. First, slice through the center, then you will automatically get four smaller rolls, correct? Then, take two smaller rolls and slice them into 3 equal parts, so you will get 6 smaller parts, right? Do the same for the other 2 smaller rolls too! Then voila! It will all be cut up in no time!
Tip: If your knife gets too sticky after slicing a few rolls, wash off the rice sticking to the knife before slicing again!
Tip: If your knife gets too sticky after slicing a few rolls, wash off the rice sticking to the knife before slicing again!
 |
| Done :) |
 |
| Love, for the family ♥ |
Happy cookin' ☺


0 comments:
Post a Comment